The 5 Best Dollhouse Roof Shingles of 2025: An Ultimate Guide
In the world of miniature artistry, few elements are as transformative as the roof. It is the literal crowning achievement of any dollhouse, capable of dictating its era, style, and soul. A well-crafted roof can turn a simple structure into a masterpiece, while a poorly chosen one can diminish even the most beautifully arranged interior. This understanding drives every dedicated miniaturist to ask the same crucial questions: what are the best shingles to use, and how can I achieve a look that is both stunning and realistic?
Welcome to the most comprehensive guide to dollhouse roofing on the internet. We have meticulously researched, tested, and compiled the definitive list of the **5 best dollhouse roof shingles** for 2025. This guide goes beyond a simple product roundup. We will explore a gallery of breathtaking **dollhouse roofing ideas** to inspire your project, dive deep into the pros and cons of every material from classic **wood shingles for your dollhouse** to modern **dollhouse asphalt roof shingles**, and provide three expert-level tutorials on **how to make dollhouse roof shingles** that will rival any store-bought product.
Your dollhouse deserves more than just a lid; it deserves a work of art. Whether you are adding the final touch to a kit or creating a custom build, this guide will provide the expertise, tools, and confidence you need to create a spectacular roof that will be the envy of the miniature world.

Part 1: The Foundations – Understanding Dollhouse Roofing Essentials
Before we review our top picks, it’s crucial to understand the fundamentals. A beautiful roof starts with a solid plan and an understanding of the key principles that govern realism in miniature.
The Unbreakable Rule: Scale is Everything
The single most common mistake beginners make is using materials that are out of scale. A shingle that is too thick or too large will instantly shatter the illusion of a miniature world. The vast majority of dollhouse kits are built in **1:12 scale**, meaning one inch in the dollhouse equals one foot in the real world. For this scale, a standard rectangular shingle should be around 3/4 inch wide by 1 inch tall. The thickness should be minimal, ideally 1/32″ or less. Always check the scale of your dollhouse before buying or making shingles.
A Gallery of Inspiration: Dollhouse Roofing Ideas
What story do you want your roof to tell? The style you choose is your narrative.
- The Victorian Manor: This style demands elegance and complexity. Think fish-scale, diamond, or hexagonal shingles in shades of gray to mimic slate. This look is about pattern and precision, perfect for showcasing your meticulous side. – The Rustic Cabin: For a log cabin or woodland cottage, authenticity is key. Use irregular, hand-split “shakes” made from real wood. Weather them heavily and add a touch of green flocking for moss to create a feeling of age and seclusion. – The Coastal Cottage: Capture the breezy feel of the seaside with uniform, rectangular wood shingles painted in a weathered gray or soft blue. A slightly faded, sun-bleached look is the goal here. – The Mid-Century Modern Home: For houses from the 1950s-70s, the realistic texture of sandpaper “asphalt” shingles is the perfect choice. A low-slope or flat roof with this material is instantly recognizable and historically accurate. – The Spanish Villa: To achieve this sun-baked aesthetic, you’ll need the iconic half-round “terracotta” tiles. This is often an advanced project using polymer clay, but the results are breathtakingly beautiful.
Part 2: The 5 Best Dollhouse Roof Shingles of 2025
We’ve analyzed materials, read countless reviews, and drawn on decades of collective miniaturist experience to bring you this list. Our “best” list includes both ready-made products and a DIY method, because the best shingle is the one that best fits your project, skill level, and budget.
1
Best Overall: Real Wood Shingles
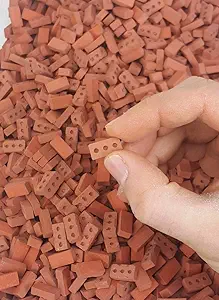
Greenleaf Miniature Cedar Shingles
When it comes to a perfect balance of realism, versatility, and sheer crafting satisfaction, nothing beats real wood. Greenleaf’s miniature cedar shingles are the gold standard. A bag contains approximately 1000 real wood shingles, machine-cut for consistency but with enough natural variation to look authentic. They are the ideal thickness (approx. 1/32″) for 1:12 scale and can be used as-is for a natural pine look or stained/painted to mimic any wood type.
- Unmatched realism and authentic wood grain.
- Highly versatile; can be stained, painted, and weathered.
- Consistent size and thickness for easy application.
- Durable and long-lasting.
- More expensive than DIY options.
- Requires staining for a true cedar or aged look.
Verdict: For the miniaturist who values authenticity above all, this is the premier choice. The ability to customize the finish makes them suitable for nearly any style of house, from a rustic farmhouse to an elegant colonial manor. They provide a high-end look that elevates any dollhouse project from a toy to an heirloom.
View on Amazon
2
Best for Modern Homes: Asphalt Shingles
“Itsy Bitsy Mini” Asphalt Shingle Strips
For any dollhouse built to represent a 20th or 21st-century home, asphalt shingles are a must for realism. These brilliant peel-and-stick strips from Itsy Bitsy Mini are made with a fine, textured grit that perfectly mimics real asphalt roofing. They come in long strips with pre-cut tabs, making application much faster than individual shingles. The self-adhesive backing is strong, and the strips are flexible enough to conform to roof angles.
- Incredibly realistic texture for modern homes.
- Peel-and-stick backing makes application fast and clean.
- Flexible strips are easy to work with.
- Relatively inexpensive for the coverage area.
- Less versatile; not suitable for historical houses.
- Can look a bit uniform without additional weathering.
Verdict: The perfect solution for contemporary, suburban, or ranch-style dollhouses. The speed of application is a huge bonus, making them a great choice for beginners who still want a highly realistic finish. A quick dusting with chalk pastels can easily break up the uniformity for an even better look.
View on Amazon
3
Best Budget / DIY Method: Sandpaper Shingles
Your Local Hardware Store’s Finest
This isn’t a product, but a technique, and it’s the best-kept secret of budget-conscious miniaturists. By using fine-grit sandpaper (220 grit or higher), you can create your own asphalt shingle strips for pennies. You have total control over the color, the shape of the tabs, and the level of weathering. It’s an incredibly effective method that allows for unlimited creativity without breaking the bank.
- Extremely inexpensive and materials are readily available.
- Total creative control over color, shape, and aging.
- The texture is virtually identical to pre-made asphalt shingles.
- A very satisfying and easy DIY project.
- Requires time and patience to cut all the strips.
- You must apply glue yourself (unlike peel-and-stick options).
Verdict: For the hands-on crafter, this is the undisputed champion. It combines the realism of textured asphalt shingles with the satisfaction and cost-effectiveness of a DIY project. The results can easily look as good or even better than store-bought strips. (See our detailed tutorial below!)
4
Best for Victorian Styles: Slate Shingles
“Miniature Crates” Real Slate Shingles
To create a truly breathtaking Victorian or Gothic manor, you need the texture and gravitas of slate. While making slate from paper is a great budget option (see our tutorial!), using real stone puts your project in another league. These shingles from Miniature Crates are cut from genuine slate. Each tile has unique color variations, textures, and a satisfying weight. They come in various shapes, including the classic fish-scale and diamond patterns essential for an authentic Victorian look.
- The absolute pinnacle of realism; it’s real stone.
- Beautiful natural color and texture variations.
- Available in intricate, historically accurate shapes.
- Extremely durable and impressive.
- Very expensive compared to other options.
- Heavy; requires a sturdy roof structure and strong adhesive.
- Can be brittle and require careful handling.
Verdict: This is a premium, heirloom-quality choice for the serious miniaturist building a showpiece. The cost and difficulty are high, but the result is a museum-quality roof with unmatched texture and authenticity. It’s the ultimate upgrade for a special project.
View on Amazon
5
Best for Beginners: Printed Shingle Sheets
“Paper Models Online” Peel-and-Stick Sheets
For those new to the hobby, a child’s first dollhouse, or a project with a tight deadline, printed peel-and-stick sheets are a fantastic option. These sheets feature a high-resolution, photorealistic image of shingles printed on adhesive-backed paper. You simply cut the sheet to the size of your roof and apply it like a sticker. While it lacks the 3D texture of individual shingles, the visual effect from a distance is surprisingly good.
- Extremely easy and fast to apply.
- No mess from glue or paint.
- Very inexpensive.
- Great for interior roofs or projects for children.
- Lacks 3D texture; looks flat up close.
- Less realistic than individual shingles.
- Limited customization options.
Verdict: The perfect choice for beginners, children’s projects, or anyone who prioritizes speed and ease over ultimate realism. While many experienced hobbyists move on from this method, it’s an invaluable and stress-free way to get a great-looking roof on your first dollhouse.
View on AmazonPart 3: The Artisan’s Workshop – How to Make Dollhouse Roof Shingles
Feeling creative? Making your own shingles is incredibly rewarding. Here are detailed guides for our favorite DIY methods.
Tutorial #1: Mastering Realistic Asphalt Shingles with Sandpaper
This guide will help you turn a cheap hardware store item into a stunningly realistic roof.
Materials Needed:
- Fine-grit sandpaper (220-400 grit) in black or dark gray.
- Acrylic craft paints in various grays, browns, and greens (optional, for weathering).
- A sharp craft knife or scissors.
- A self-healing cutting mat and a metal ruler.
- Tacky glue.
Step-by-Step Instructions:
- Add Color Variation (Optional Pro Step): Before cutting, lightly sponge or dry-brush different shades of gray and brown acrylic paint over the sandpaper’s surface. This breaks up the uniform color and adds incredible realism. Let it dry completely.
- Mark and Cut Strips: On the back (paper side), use a pencil to mark out long strips that are 1″ to 1.25″ tall. Use a sharp knife and ruler to carefully cut these strips.
- Create the Tabs: Use scissors to snip small vertical cuts along the bottom edge of each strip to create the shingle tabs. For a standard 3-tab look, make two cuts per every 1.5 inches of length. For a more modern “architectural” look, vary the width of the tabs randomly.
- Installation: Start at the bottom of your roof. Apply a thin line of tacky glue and press your first strip into place. For the second row, make sure the tabs are offset from the row below it, covering the gaps. Continue up to the peak of the roof.
- Finish the Ridge: Cut a few strips that are about 1.5″ wide. Cut these into individual 1.5″ x 1.5″ squares. Fold each square in half to form a “V” shape. Glue these along the peak of the roof, overlapping them like real ridge caps.
Part 4: Pro-Level Finishing Touches
A great roof is more than just shingles. The final details are what create a masterpiece.
- Weathering: Never underestimate the power of chalk pastels. Scrape some black, gray, and brown pastels into a powder, and use a soft brush to lightly dust your finished roof, focusing on the areas between shingles and along the eaves. – Flashing and Valleys: For roof valleys or where the roof meets a chimney, you can create realistic “flashing” using strips of aluminum foil or metallic tape, gently glued into the seams. – Moss and Lichen: For an old, weathered roof, apply tiny dabs of glue and sprinkle on fine green flocking powder (used for model train scenery) to create realistic moss.
Once your exterior is perfect, think about the interior. A beautiful roof can be accentuated from the inside by the warm glow of lights. Installing one of the best dollhouse lighting kits can make your entire project come to life, highlighting the textures you so carefully created. A stunning exterior deserves an equally impressive interior, filled with the best dollhouse furniture and charming dollhouse accessories to complete the story.
Frequently Asked Questions
What is the best glue for dollhouse shingles?
For most materials (wood, paper, sandpaper), a high-quality PVA glue like Aleene’s Original Tacky Glue is the best choice. It grabs quickly but allows for repositioning. For heavy materials like real slate, or for a quick bond on ridge caps, a strong, clear-drying construction adhesive like Aleene’s Ultimate or a high-temp hot glue gun may be necessary.
How do I handle the peak of the roof?
The peak, or “ridge,” is finished with a ridge cap. This is made by creating individual shingles that fold over the top. For wood or paper shingles, you can score the back of a slightly wider shingle and fold it. For sandpaper, cut squares and fold them. Glue them down one by one, overlapping each by about half, starting from one end of the roof peak and working your way across.
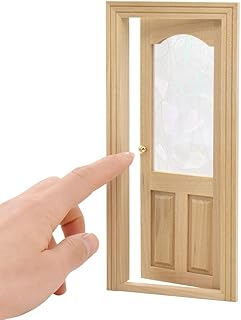
My dollhouse is a plastic one like a Barbie house. Can I still re-roof it?
Yes! While many plastic dollhouses like the best Barbie dollhouse come with a molded plastic roof, you can absolutely upgrade it. The key is preparation. Lightly sand the plastic roof surface to give it some “tooth” for the glue to adhere to. Then, spray it with a plastic-compatible primer (like Krylon Fusion for Plastic). Once the primer is dry, you can apply your new shingles using a strong glue as described in this guide.